SKU:
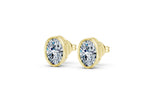
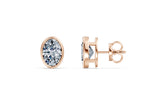
Style:
Oval
Total Diamond Weight
1
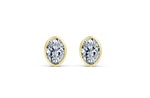
Metal Type & Color:
14K - White Gold
Length
Style:
Oval
Total Diamond Weight
1
Metal Type & Color:
14K - White Gold
Length
Style:
Oval
Total Diamond Weight
1.5
Metal Type & Color:
14K - White Gold
Length
Style:
Oval
Total Diamond Weight
1.5
Metal Type & Color:
14K - White Gold
Length
Style:
Oval
Total Diamond Weight
2
Metal Type & Color:
14K - White Gold
Length
Style:
Oval
Total Diamond Weight
2
Metal Type & Color:
14K - White Gold
Length
Style:
Oval
Total Diamond Weight
2.5
Metal Type & Color:
14K - White Gold
Length
Style:
Oval
Total Diamond Weight
2.5
Metal Type & Color:
14K - White Gold
Length
Style:
Oval
Total Diamond Weight
3
Metal Type & Color:
14K - White Gold
Length
Style:
Oval
Total Diamond Weight
3
Metal Type & Color:
14K - White Gold
Length
Style:
Oval
Total Diamond Weight
3.5
Metal Type & Color:
14K - White Gold
Length
Style:
Oval
Total Diamond Weight
3.5
Metal Type & Color:
14K - White Gold
Length
Style:
Oval
Total Diamond Weight
4
Metal Type & Color:
14K - White Gold
Length
Style:
Oval
Total Diamond Weight
4
Metal Type & Color:
14K - White Gold
Length
Style:
Oval
Total Diamond Weight
1
Metal Type & Color:
14K - Yellow Gold
Length
Style:
Oval
Total Diamond Weight
1
Metal Type & Color:
14K - Yellow Gold
Length
Style:
Oval
Total Diamond Weight
1.5
Metal Type & Color:
14K - Yellow Gold
Length
Style:
Oval
Total Diamond Weight
1.5
Metal Type & Color:
14K - Yellow Gold
Length
Style:
Oval
Total Diamond Weight
2
Metal Type & Color:
14K - Yellow Gold
Length
Style:
Oval
Total Diamond Weight
2
Metal Type & Color:
14K - Yellow Gold
Length
Style:
Oval
Total Diamond Weight
2.5
Metal Type & Color:
14K - Yellow Gold
Length
Style:
Oval
Total Diamond Weight
2.5
Metal Type & Color:
14K - Yellow Gold
Length
Style:
Oval
Total Diamond Weight
3
Metal Type & Color:
14K - Yellow Gold
Length
Style:
Oval
Total Diamond Weight
3
Metal Type & Color:
14K - Yellow Gold
Length
Style:
Oval
Total Diamond Weight
3.5
Metal Type & Color:
14K - Yellow Gold
Length
Style:
Oval
Total Diamond Weight
3.5
Metal Type & Color:
14K - Yellow Gold
Length
Style:
Oval
Total Diamond Weight
4
Metal Type & Color:
14K - Yellow Gold
Length
Style:
Oval
Total Diamond Weight
4
Metal Type & Color:
14K - Yellow Gold
Length
Style:
Oval
Total Diamond Weight
1
Metal Type & Color:
14K - Rose Gold
Length
Style:
Oval
Total Diamond Weight
1
Metal Type & Color:
14K - Rose Gold
Length
Style:
Oval
Total Diamond Weight
1.5
Metal Type & Color:
14K - Rose Gold
Length
Style:
Oval
Total Diamond Weight
1.5
Metal Type & Color:
14K - Rose Gold
Length
Style:
Oval
Total Diamond Weight
2
Metal Type & Color:
14K - Rose Gold
Length
Style:
Oval
Total Diamond Weight
2
Metal Type & Color:
14K - Rose Gold
Length
Style:
Oval
Total Diamond Weight
2.5
Metal Type & Color:
14K - Rose Gold
Length
Style:
Oval
Total Diamond Weight
2.5
Metal Type & Color:
14K - Rose Gold
Length
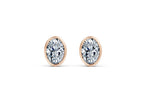
Style:
Oval
Total Diamond Weight
3
Metal Type & Color:
14K - Rose Gold
Length
Style:
Oval
Total Diamond Weight
3
Metal Type & Color:
14K - Rose Gold
Length
Style:
Oval
Total Diamond Weight
3.5
Metal Type & Color:
14K - Rose Gold
Length
Style:
Oval
Total Diamond Weight
3.5
Metal Type & Color:
14K - Rose Gold
Length
Style:
Oval
Total Diamond Weight
4
Metal Type & Color:
14K - Rose Gold
Length
Style:
Oval
Total Diamond Weight
4
Metal Type & Color:
14K - Rose Gold
Length
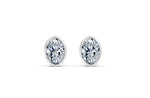
Style:
Oval
Total Diamond Weight
1
Metal Type & Color:
18K - White Gold
Length
Style:
Oval
Total Diamond Weight
1
Metal Type & Color:
18K - White Gold
Length
Style:
Oval
Total Diamond Weight
1.5
Metal Type & Color:
18K - White Gold
Length
Style:
Oval
Total Diamond Weight
1.5
Metal Type & Color:
18K - White Gold
Length
Style:
Oval
Total Diamond Weight
2
Metal Type & Color:
18K - White Gold
Length
Style:
Oval
Total Diamond Weight
2
Metal Type & Color:
18K - White Gold
Length
Style:
Oval
Total Diamond Weight
2.5
Metal Type & Color:
18K - White Gold
Length
Style:
Oval
Total Diamond Weight
2.5
Metal Type & Color:
18K - White Gold
Length
Style:
Oval
Total Diamond Weight
3
Metal Type & Color:
18K - White Gold
Length
Style:
Oval
Total Diamond Weight
3
Metal Type & Color:
18K - White Gold
Length
Style:
Oval
Total Diamond Weight
3.5
Metal Type & Color:
18K - White Gold
Length
Style:
Oval
Total Diamond Weight
3.5
Metal Type & Color:
18K - White Gold
Length
Style:
Oval
Total Diamond Weight
4
Metal Type & Color:
18K - White Gold
Length
Style:
Oval
Total Diamond Weight
4
Metal Type & Color:
18K - White Gold
Length
Style:
Oval
Total Diamond Weight
1
Metal Type & Color:
18K - Yellow Gold
Length
Style:
Oval
Total Diamond Weight
1
Metal Type & Color:
18K - Yellow Gold
Length
Style:
Oval
Total Diamond Weight
1.5
Metal Type & Color:
18K - Yellow Gold
Length
Style:
Oval
Total Diamond Weight
1.5
Metal Type & Color:
18K - Yellow Gold
Length
Style:
Oval
Total Diamond Weight
2
Metal Type & Color:
18K - Yellow Gold
Length
Style:
Oval
Total Diamond Weight
2
Metal Type & Color:
18K - Yellow Gold
Length
Style:
Oval
Total Diamond Weight
2.5
Metal Type & Color:
18K - Yellow Gold
Length
Style:
Oval
Total Diamond Weight
2.5
Metal Type & Color:
18K - Yellow Gold
Length
Style:
Oval
Total Diamond Weight
3
Metal Type & Color:
18K - Yellow Gold
Length
Style:
Oval
Total Diamond Weight
3
Metal Type & Color:
18K - Yellow Gold
Length
Style:
Oval
Total Diamond Weight
3.5
Metal Type & Color:
18K - Yellow Gold
Length
Style:
Oval
Total Diamond Weight
3.5
Metal Type & Color:
18K - Yellow Gold
Length
Style:
Oval
Total Diamond Weight
4
Metal Type & Color:
18K - Yellow Gold
Length
Style:
Oval
Total Diamond Weight
4
Metal Type & Color:
18K - Yellow Gold
Length
Style:
Oval
Total Diamond Weight
1
Metal Type & Color:
18K - Rose Gold
Length
Style:
Oval
Total Diamond Weight
1
Metal Type & Color:
18K - Rose Gold
Length
Style:
Oval
Total Diamond Weight
1.5
Metal Type & Color:
18K - Rose Gold
Length
Style:
Oval
Total Diamond Weight
1.5
Metal Type & Color:
18K - Rose Gold
Length
Style:
Oval
Total Diamond Weight
2
Metal Type & Color:
18K - Rose Gold
Length
Style:
Oval
Total Diamond Weight
2
Metal Type & Color:
18K - Rose Gold
Length
Style:
Oval
Total Diamond Weight
2.5
Metal Type & Color:
18K - Rose Gold
Length
Style:
Oval
Total Diamond Weight
2.5
Metal Type & Color:
18K - Rose Gold
Length
Style:
Oval
Total Diamond Weight
3
Metal Type & Color:
18K - Rose Gold
Length
Style:
Oval
Total Diamond Weight
3
Metal Type & Color:
18K - Rose Gold
Length
Style:
Oval
Total Diamond Weight
3.5
Metal Type & Color:
18K - Rose Gold
Length
Style:
Oval
Total Diamond Weight
3.5
Metal Type & Color:
18K - Rose Gold
Length
Style:
Oval
Total Diamond Weight
4
Metal Type & Color:
18K - Rose Gold
Length
Style:
Oval
Total Diamond Weight
4
Metal Type & Color:
18K - Rose Gold
Length
Style:
Oval
Total Diamond Weight
1
Metal Type & Color:
PL - Platinum
Length
Style:
Oval
Total Diamond Weight
1
Metal Type & Color:
PL - Platinum
Length
Style:
Oval
Total Diamond Weight
1.5
Metal Type & Color:
PL - Platinum
Length
Style:
Oval
Total Diamond Weight
1.5
Metal Type & Color:
PL - Platinum
Length
Style:
Oval
Total Diamond Weight
2
Metal Type & Color:
PL - Platinum
Length
Style:
Oval
Total Diamond Weight
2
Metal Type & Color:
PL - Platinum
Length
Style:
Oval
Total Diamond Weight
2.5
Metal Type & Color:
PL - Platinum
Length
Style:
Oval
Total Diamond Weight
2.5
Metal Type & Color:
PL - Platinum
Length
Style:
Oval
Total Diamond Weight
3
Metal Type & Color:
PL - Platinum
Length
Style:
Oval
Total Diamond Weight
3
Metal Type & Color:
PL - Platinum
Length
Style:
Oval
Total Diamond Weight
3.5
Metal Type & Color:
PL - Platinum
Length
Style:
Oval
Total Diamond Weight
3.5
Metal Type & Color:
PL - Platinum
Length
Style:
Oval
Total Diamond Weight
4
Metal Type & Color:
PL - Platinum
Length
Style:
Oval
Total Diamond Weight
4
Metal Type & Color:
PL - Platinum
Length